Your Canon MX490 Printer needs suitable drivers and software to set up. So, visit the Canon printer support site, i.e., ij.start.cannon and start the process. PIXMA MX490 Printer offers Copy, Scan and Fax features in one model. If you have a newer (or older) Canon MX490, get relevant assistance to set it up with the following guide.
Start with Canon MX490 Unboxing
- Remove outer box seal recently purchased Canon printer model.
- Open the box seal and ensure you get a few essentials, i.e., setup CD for windows and mac, cable cords, ink cartridges, and manual.
- Now, carefully lift the Canon PIXMA MX490 printer model from the box and remove the packaging.
- Place the printer nearby PC or laptop.
- Insert the power cable to the PIXMA MX490 rear and connect to the wall outlet.
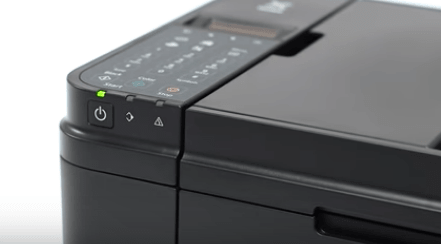
- Press the ON button to turn on the Canon printer.
- Load white papers in the cassette.
- Install colored and black cartridges and follow Canon MX490 wireless setup next.
Canon MX490 Wireless Setup – WiFi Connection
Canon MX490 model is a wireless printer that you have to connect through a WiFi connection. Here’s how to set up the wireless connection;
- First of all, turn on your MX490 printer model.
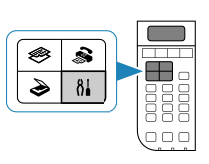
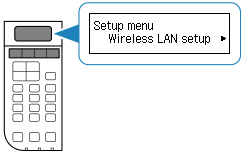
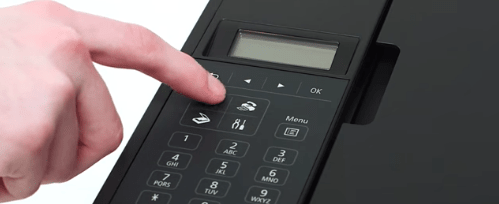
- On the front menu, press the Setup button looks like a screwdriver.
- Press the left or right button till the Wireless LAN setup appears.
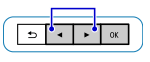
- Press OK when you see the Wireless LAN setup option.
- Select the Push button method on the printer screen.
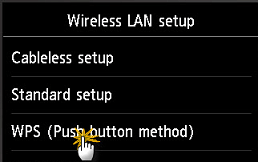
- Press the WPS button on the wireless router.

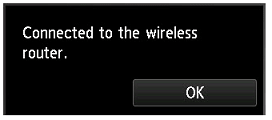
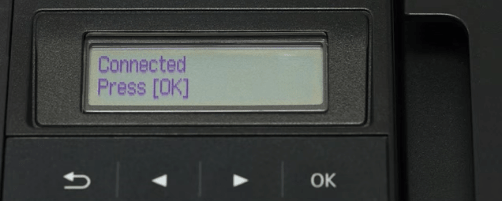
- Hold for 2 minutes and press OK. Your MX490 is connected to the wireless connection.
If your router isn’t wireless, then you have to use the Standard setup method or Pin code. With this, your Canon PIXMA MX490 Wireless Setup has completed one step. Now, you’ve to perform the printer drivers download and installation step.
Download Canon PIXMA MX490 Driver and Software
You can download the software from usa.canon.com, however, we’ll go through more easiest method shown below;
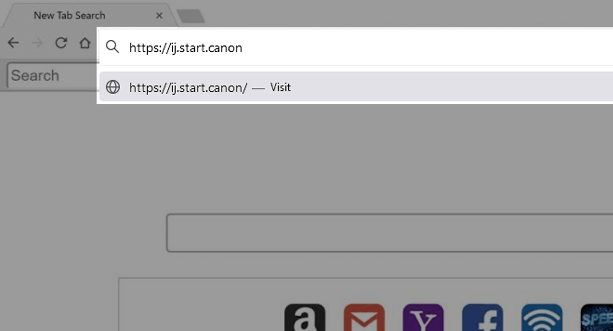
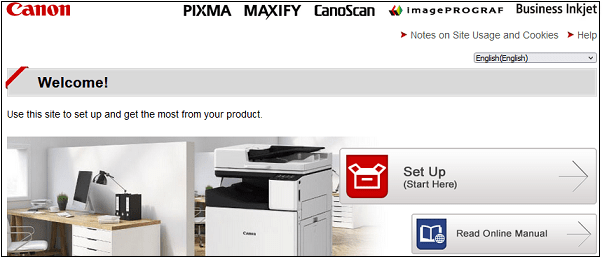
- Step 1 – Go to the official website ij.start.cannon.
Open a web browser on your PC and go to canon support portal, ij.start.canon. It will open the Canon welcome page.
- Step 2 – Continue with the “Set Up” option.
Four options displays on the screen, including Set Up, Online Manual, Recommended Functions, and FAQs. You have to select the “Set Up (Start Here)” option to reach next.
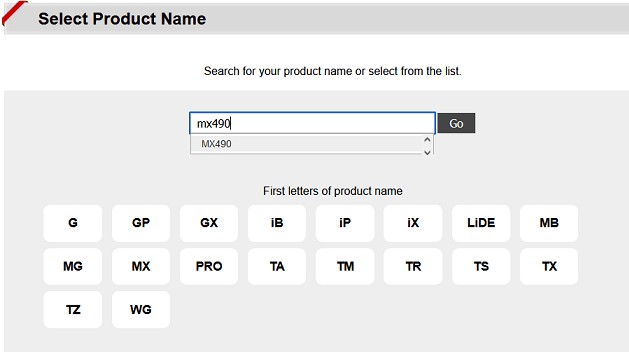
- Step 3 – Enter “MX490” in the product model box.
This step has two options, either add a model number or select from the page. Opt 1- Type the “MX490” in the shown box, click on the given model, and click Go. Opt 2- you otherwise can click on the “MX” button on the shown list and select your MX490 model from the MX series.
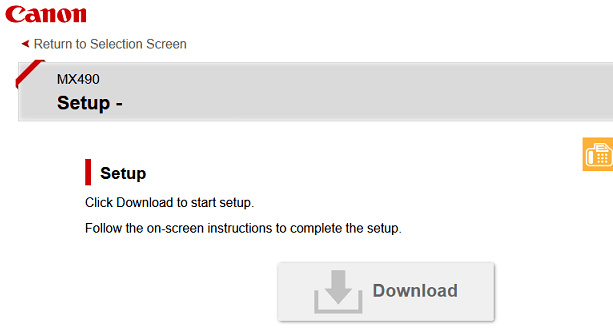
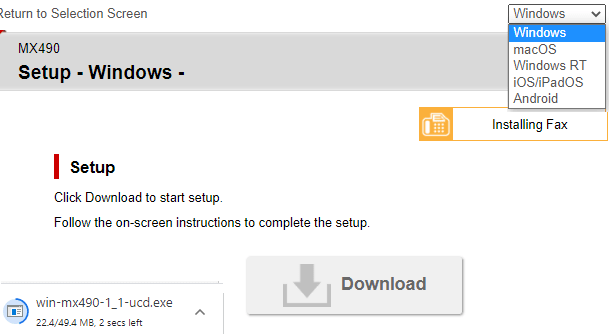
- Step 4 – Click “Download” to get setup.
The complete Canon PIXMA MX490 Driver and software pack should appear on your screen. First, make sure you’ve selected your current OS from the top right. Then, click on the Download tab to get a universal Canon printer setup on your system.
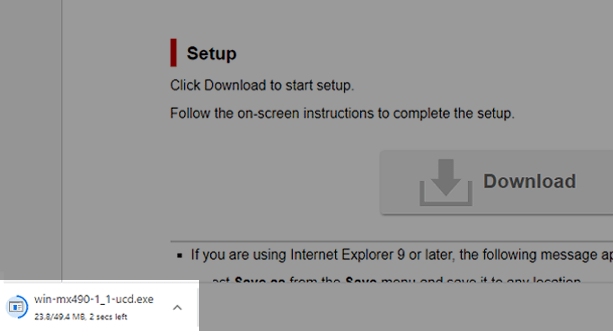
- Step 5 – Download Canon MX490 setup and run it.
If another prompt display on the browser, select Save or Save As option. When the MX490 setup is downloaded, click run or double-click to start the Canon MX490 printer install.
What kind of printer is Canon MX490?
Canon MX490 is a wireless all-in-one Printer model that offers a user multiple functions, including print, copy, scan and fax. It’s the best choice for business and home use. With the 2.5″ LCD screen, you get 20 sheets of the document feeder. The wireless features support AirPrint and Google Cloud Print.
PIXMA MX490 Setup On Windows
- Turn on your PIXMA MX490 wireless printer.
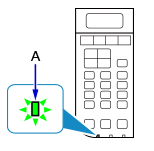
Press the ON button and see whether the light is stable. Your PIXMA MX490 is turned on.
2. Set up the wireless connection with WiFi network.
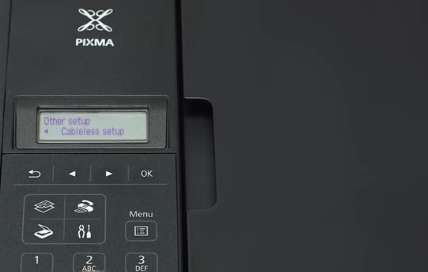
Press the Copy and Setup button to see Wireless LAN setup and tap OK. Now press and hold the WPS button on the router until the connected status appears. Otherwise, press Stop and select Standard Setup > Press right > Other Setup > Manual Setup > Press right > Cableless Setup > OK.
3. Download Canon Pixma MX490 setup or insert setup CD
The best way to download Canon Pixma MX490 drivers is by visiting ij.start.canon site. However, you can insert the CD for windows on your PC. If you visit the official site, go with Setup > enter printer model MX490. Then hit download and wait for win-MX490-1_1-mcd.exe to download.
4. Run Canon MX490 printer install file.
Click Run once the download is finished. Or double-click on the “win-MX490-1_1-mcd.exe” file on the download location. It’ll quickly start the installation. Click Next.
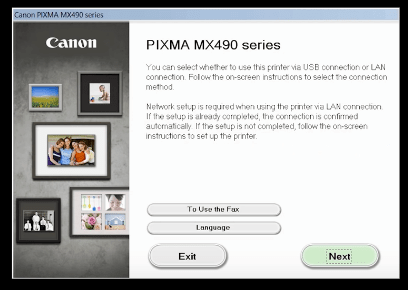
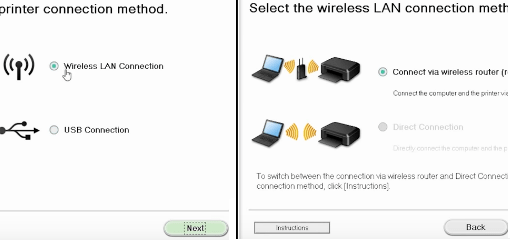
5. Select a connection type (Wireless).
A connection type screen will appear on your Windows installation screen; select “Wireless” connection. On the next page, select “connect via a router” and select your Canon MX490 printer from shown list.
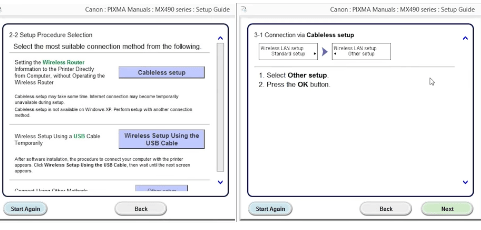
6. Click “Other Methods” and finish the wireless connection.
A guide will show up; click Next. In the Other Methods, click Cableless setup > Next. Once the connection establishes, the “Connection Completed” window shows.
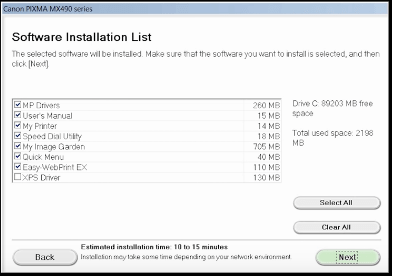
7. Select Canon MX490 software to install on windows.
Tick on the software that your wish to install from the list on the current screen. Go next and accept license terms by clicking Yes.
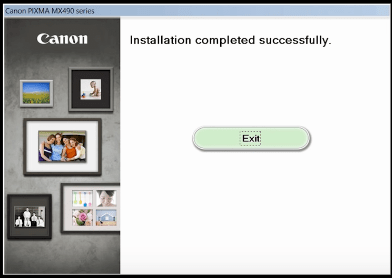
- Follow on-screen instructions to finish the process.
Click “complete” in the setup completion screen. A few steps are remaining, hence follow according to windows installation instructions.
Canon MX490 Setup For Mac
- Configure the initial hardware screen.
Turn on your Canon MX490 and press the Copy to set the initial screen. Then, press the screwdriver button and press if it found the router, press stop.
2. Connect the printer to WiFi.
If your printer can’t find a router, Standard Setup appears on the control panel; press OK. Select your Access point and enter a passphrase or WiFi key, press OK. If you see the connected message, Canon MX490 wireless setup is done.
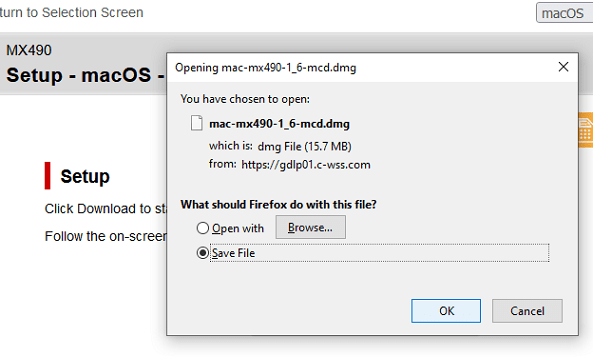
3. Use the mac setup CD or download online drivers.
You can insert the shipped macOS CD and run the software. Downloading online drivers from canon.com/ijsetup is a suitable method. For it, you have to visit the site, start with Setup and provide the MX490 model. The download option will automatically appear.
4. Start the Canon MX490 setup installation.
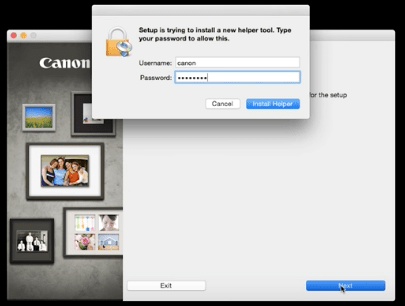
Double-click on “mac-MX490-1_6-mcd.dmg” to open the Canon MX490 printer install file. Provide your mac admin password to continue and click Installer Helper.
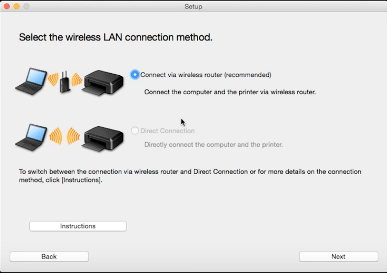
5. Setup wireless installation method.
Select Wireless LAN connection > Connect via router. Then, the software will start searching your printer. When you see your Canon MX490 serial number on the installation screen, select and click next.
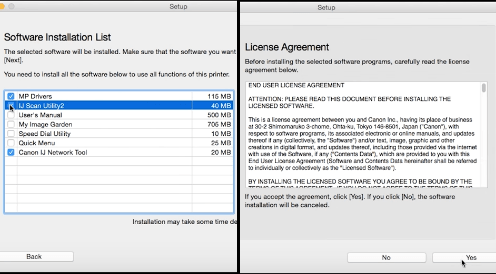
6. Select Canon MX490 software and accept license terms.
Tick on the software you need to install on your macOS. You can also select all at once and click next. Then, review the software license and click Yes to accept terms.
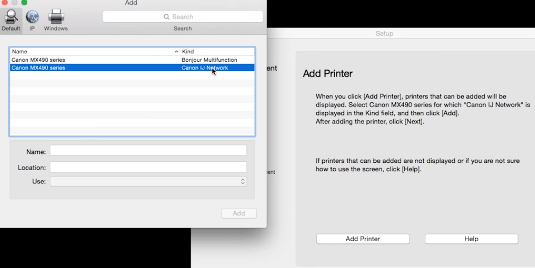
7. Wait for setup installation and add the printer to mac.
The installation will take a few minutes on macOS. Then click “Add printer” and select the Canon MX490 series printer from shown list. Once the printer is added to the macOS device list, continue the installation.
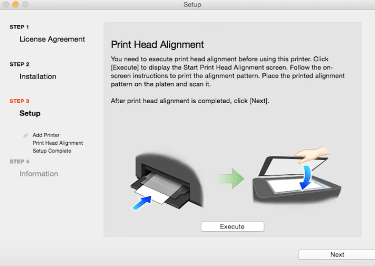
8. Complete the Canon PIXMA MX490 setup.
Execute the remaining file and follow on-screen instructions to end the process. You can start printing once done.