ij.start canon – Canon.com/ijsetup
Set up a Canon inkjet printer – ij.start canon
http://ij.start.canon
1- Launch a web browser on your PC or laptop.
Close all background apps on your PC or laptop. Then, double click on your regular browser to open it. You can use the default one or go through others, i.e., Chrome, Edge, Mozilla Firefox.

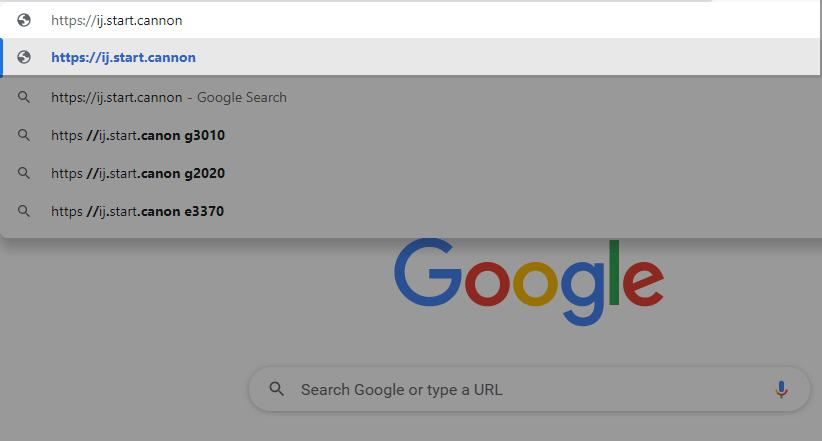
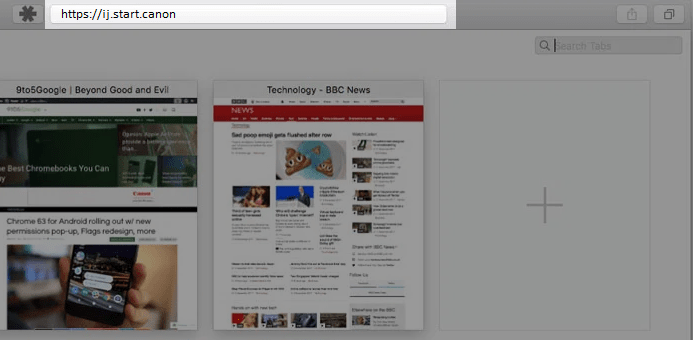
2- Go to the https://ij.start.canon website.
On the web address bar, enter the “https://ij.start.cannon” URL and press Enter key. The http://ij.start.canon is a Canon printer drivers download site that offers the latest software and drivers to download on your operating system.

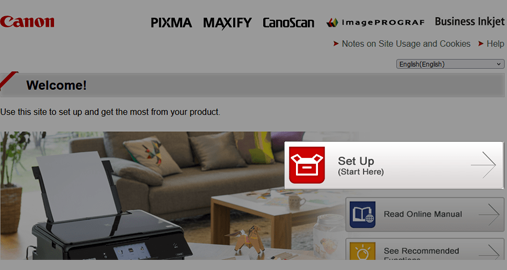
3- Click the “Set Up” tab to continue.
The current page will show you four option for different information. Here, you’ve to select the “Set Up (Start Here)” tab to find the right options on the next page.
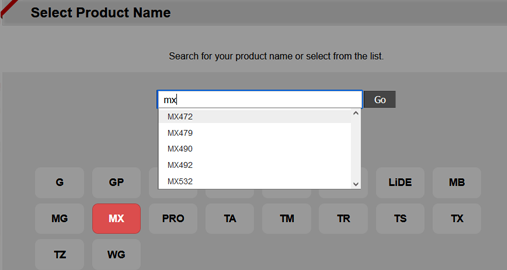
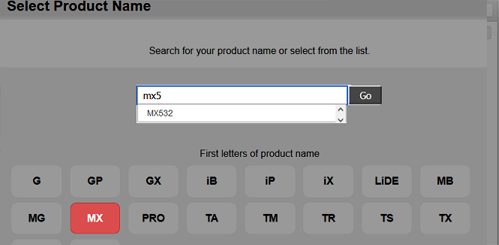
4- Select your Canon inkjet printer model.
The https://ij.start.canon site takes you to the Product page. Here a box appears asks you to enter the model name, hence type your printer model name, i.e., TS302 and click Go. You have another option to find your canon model. Scroll down the page and click on the Canon printer series to jump next.
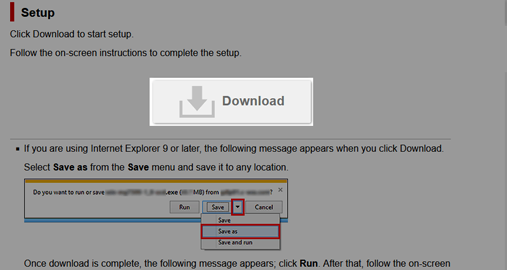
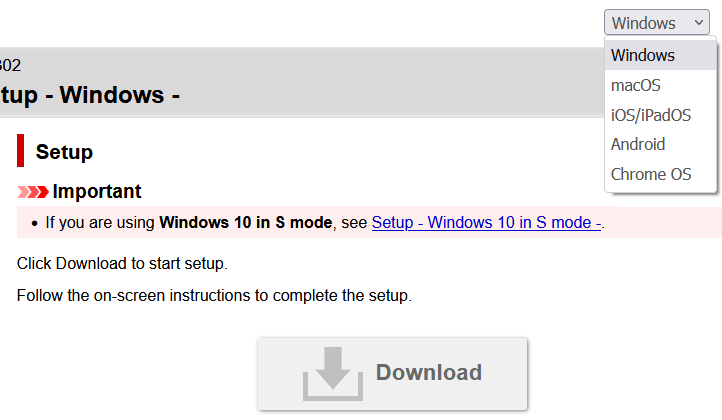
5- Start Canon printer drivers download.
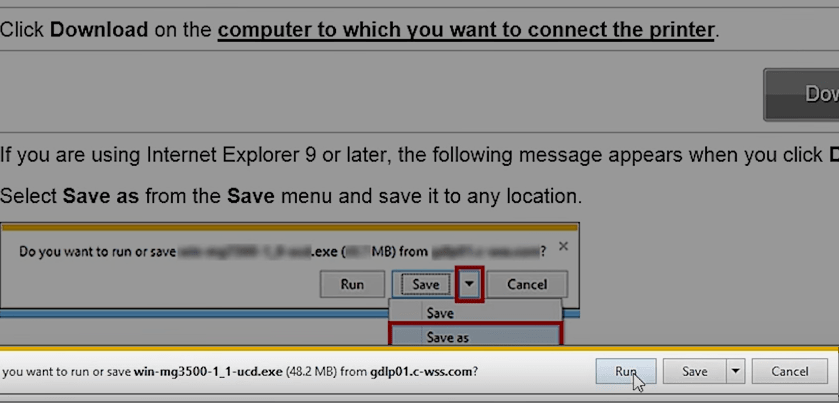
The download page appears automatically next. You have to click on the “Download” tab. Select the “Save” or “Save As” tab if you see another prompt on the download screen. For example, your printer software would start downloading quickly.
6- Run the downloaded drivers and software.
Once you finish the Canon ij setup download on your system, click “Run” to start the installation. Then, follow on-screen instructions to complete the ij setup installation.

Connecting Canon IJ Printer to WiFi
WiFi or wireless connection is the best way to connect your PC and Canon printer. However, your printer should be the wireless model for this process. So let’s see how you can connect the WiFi to the IJ printer.
Step 1 – Ensure you’ve turned on your Canon printer model.
Step 2 – Install the printer drivers from the http://ij.start.cannon website.
Step 3 – Turn on your Canon model by pressing the ON button.
Step 4 – Tap or press the wireless icon or WiFi button.
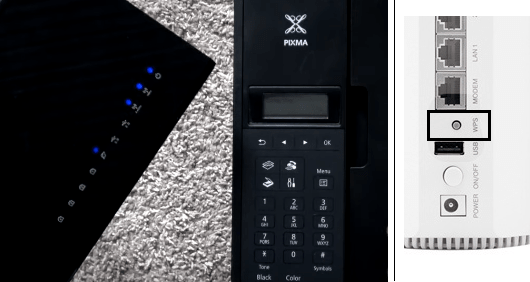
Step 5 – The WiFi lamp should flash, at this time, make sure your wireless router is working.
Step 6 – Then, push the WPS button on the wireless router for a few seconds.
Step 7 – Your printer may show you connected status. If not, check the WiFi and ON lights are; if stable, the connection has been made successfully.
Wireless Installation On Windows
- Turn on your Canon ij printer.
Make sure your printer is plugged to the power switch. Then, press the ON button to start your Canon inkjet printer.

2. Select WiFi setup and connection method
Most of the users use the WPS method if a direct WiFi button is available. Otherwise, tap OK in the Setup >WiFi Setup option.
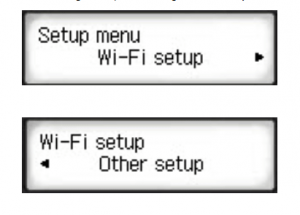 3. Tap on WPS option.
Use the right arrow and select WPS (PIN Code) option. You may also use the WPS (Push button) method if your router has a direct WPS button.
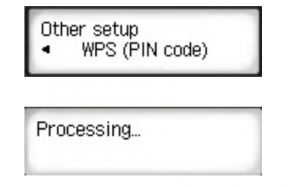 4. Enter the PIN code and connect the printer to the wireless connection.
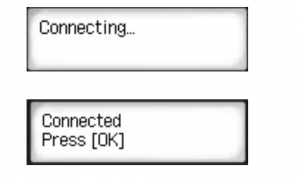
Your canon printer display shows up a PIN code that you need to enter on the router. You should read the router manual to learn how to enter this PIN. Next, you’ll see “Connected status” on the printer display; tap OK.
5. Open https://ij.start.cannon URL on the web browser.
Launch a web browser and visit http://ij.start.cannon site to find correct drivers and software for your canon printer model.
6. Download Canon printer drivers for windows.
Ij.start.canon shows four options, select Set Up, then enter your Canon printer model name to jump on the download page. Now, select “Windows OS” from the upper right corner and click on the “download” tab to download universal drivers for your model.
7. Start the installation by selecting Run.
When http://ij.start.canon completes Ij printer drivers download, click Run to start the process. Otherwise, double-click on the .exe file then selects the Start Setup tab.
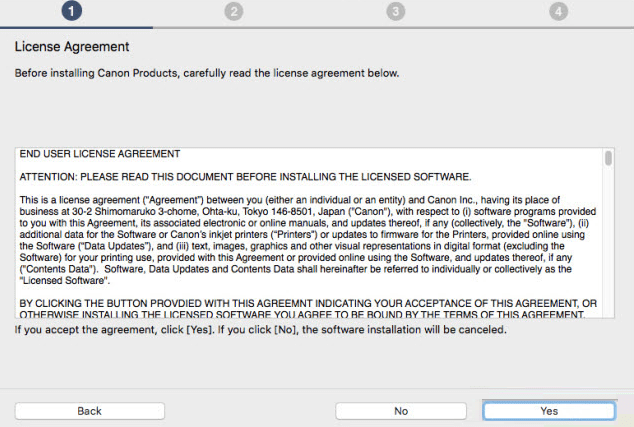
8. Click Yes to accept license terms.
A license agreement is the next window in the installation setup. You should review it, then click Yes to accept Canon printer’s terms.
9. Select the preferred option if the Extended Survey Program appears.
An Extended Survey Program window (may or may not) appears that keeps you updated by sending information, so you can join this survey program by checking the “Deactivate the block” box and clicking Agree.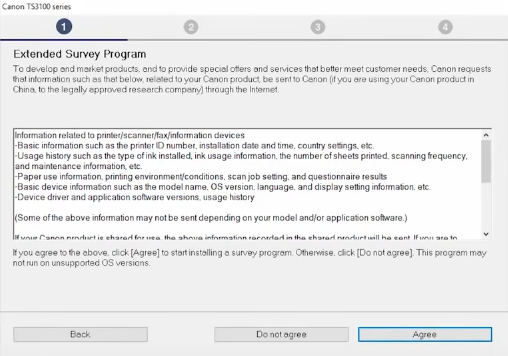
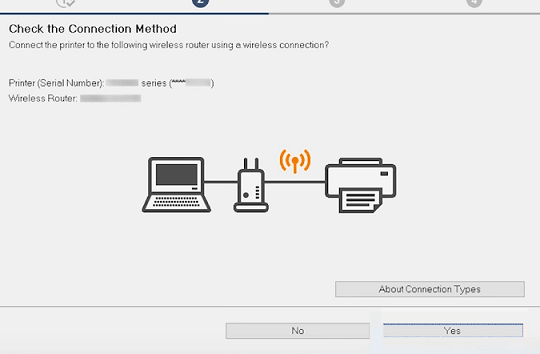
10. Check the connection method to continue.
As we are using wireless installation, a connection method screen appears during the process. Hence you have to ensure your connection and models details. Then, click Yes to confirm and wait for printer drivers’ installation.
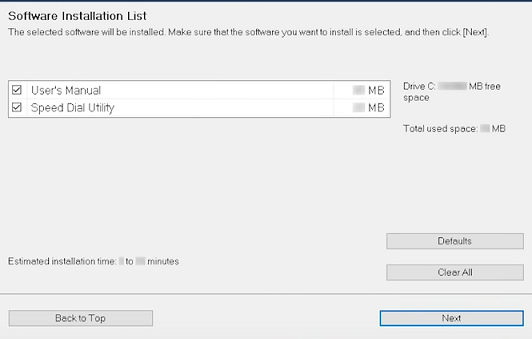
11. If required, install additional printer or scanner drivers.
The software you downloaded from https://ij.start.canon comes with a few printer and scanners drivers that you can install now. A list will appear on your screen; hence select drivers you require and follow prompts to install. Once the final installation page displays, click Exit to finish.
12. Exit the screen once Canon printer drivers are installed.
It takes a few seconds to minutes, and your Canon ij setup will be completed. Click “Exit” to close the installation window.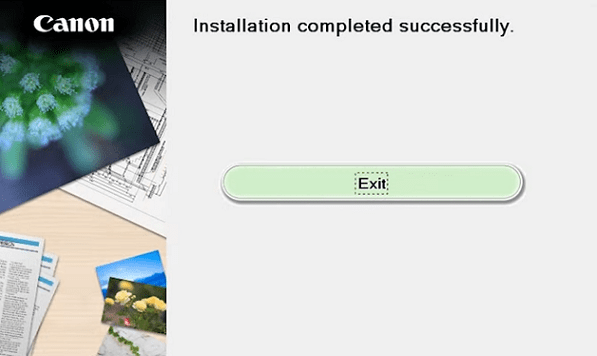
Install Canon Printer Wirelessly On Mac
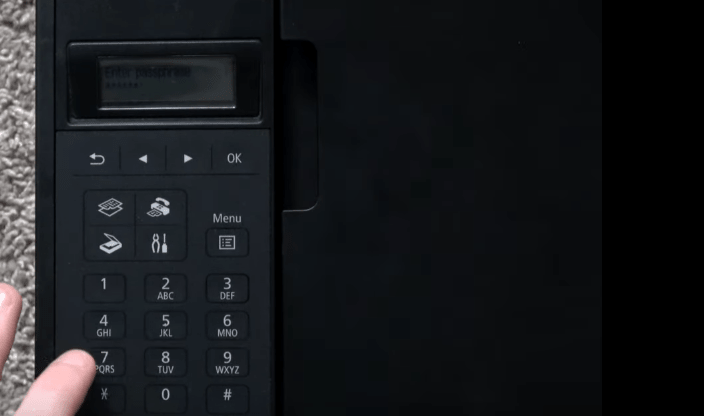
- Turn on your printer and press the screwdriver (setting) button.
Press the ON button to start the Canon printer, then find a screwdriver looks button. It is the setting button, hence press to display settings on the printer screen.

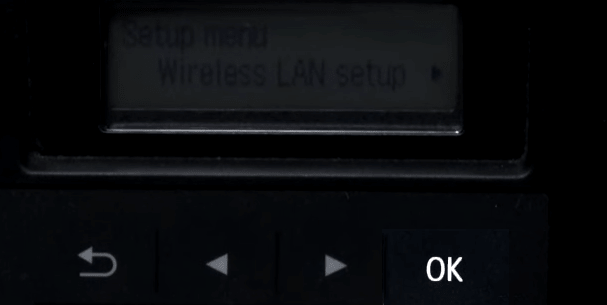
2. Press OK on Wireless LAN setup.
The Canon printer screen shows you the Wireless LAN setup option. Tap OK and press the right button until you see the “WPS Push button” tab. Again press OK.
3. Turn on the wireless router to proceed WPS Push Button method.
If your wireless router has stable lights, then it’s working well. Hence, now push the WPS button on your router until you see a new light flash. The printer will show you the “connected” status on the screen.
4. You can select the WPS PIN method to connect the network.
If your router doesn’t have a WPS button, you can use WPS PIN to connect the network. Its manual connection procedure requires selecting the “Manual connect” or “WPS PIN” option using the same screwdriver or setting button. You should know the PIN of the router connection and enter it on the Printer screen when asked. If the PIN is correct, press OK, and the canon printer model will be connected to the WiFi network.
5. Now, visit https://ij.start.canon using Safari.
Open a browser like Safari on your macOS and enter “http://ij.start.canon” on the browser search tab. You’ll automatically jump to the canon printer help site, where you’ve to click on the “Set up” tab.
6. Use your Canon printer identity to download the latest software.
Selecting the “Set Up” option on http://ij.start.cannon site redirects you to the product list page. Here, enter your printer model name on the shown box or scroll down the page and select from the displayed series list.
7. Select macOS and click download to get Canon ij setup.

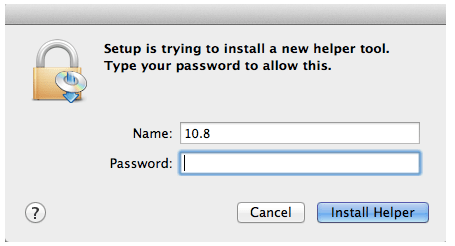
8. Start the installation and enter mac account details.
From the dock, click the Canon printer icon and double-click on the downloaded .dmg file to begin Ij start Canon software installation. Then, type the mac admin account ID and password to continue and click the “Install Helper” option.
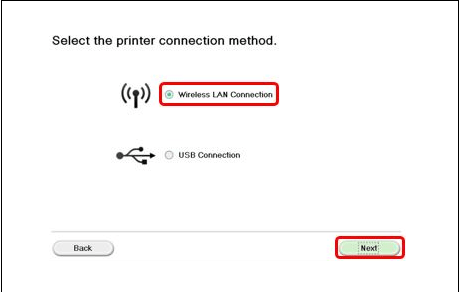
9. Accept license terms and select wireless connection.
Select your region and click Yes to accept Canon ij setup license terms. Next, tick on “Wireless LAN connection” to continue.
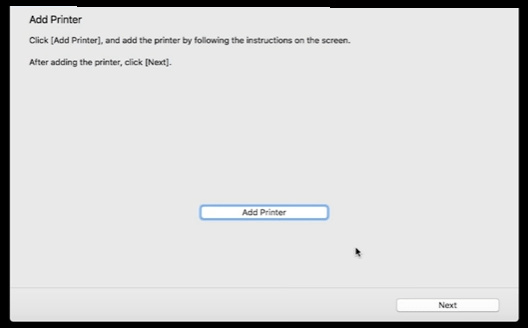
10. Add your Canon printer model from the given list.
The ij start canon software is about to finish installation; therefore, you have to add your printer series to your macOS device list. Click “Add printer” and tap on your model.
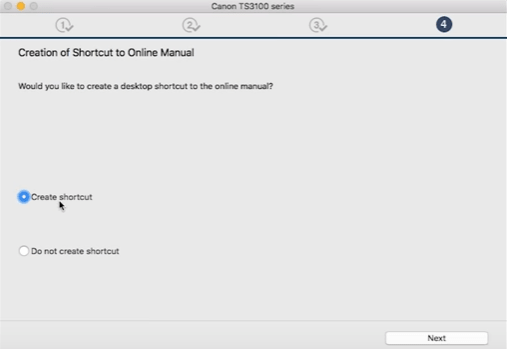
11. Finish the Canon wireless installation.
Install Canon printer’s additional drivers from the same software pack you downloaded from the https://ij.start.cannon site. Once finished, you can create a shortcut to the desktop and click Exit to close the installation window.